Astrophotography Workshop
Welcome to tonight’s Astrophotography Workshop! We’ll cover the fundamentals of photographing the night sky, from camera settings to practical tips. By the end of this session, you’ll have the knowledge to start capturing the beauty of stars, the Milky Way, and more.
What You Will Learn Today
• How to set up your gear for astrophotography
• Understanding exposure triangle in night photography
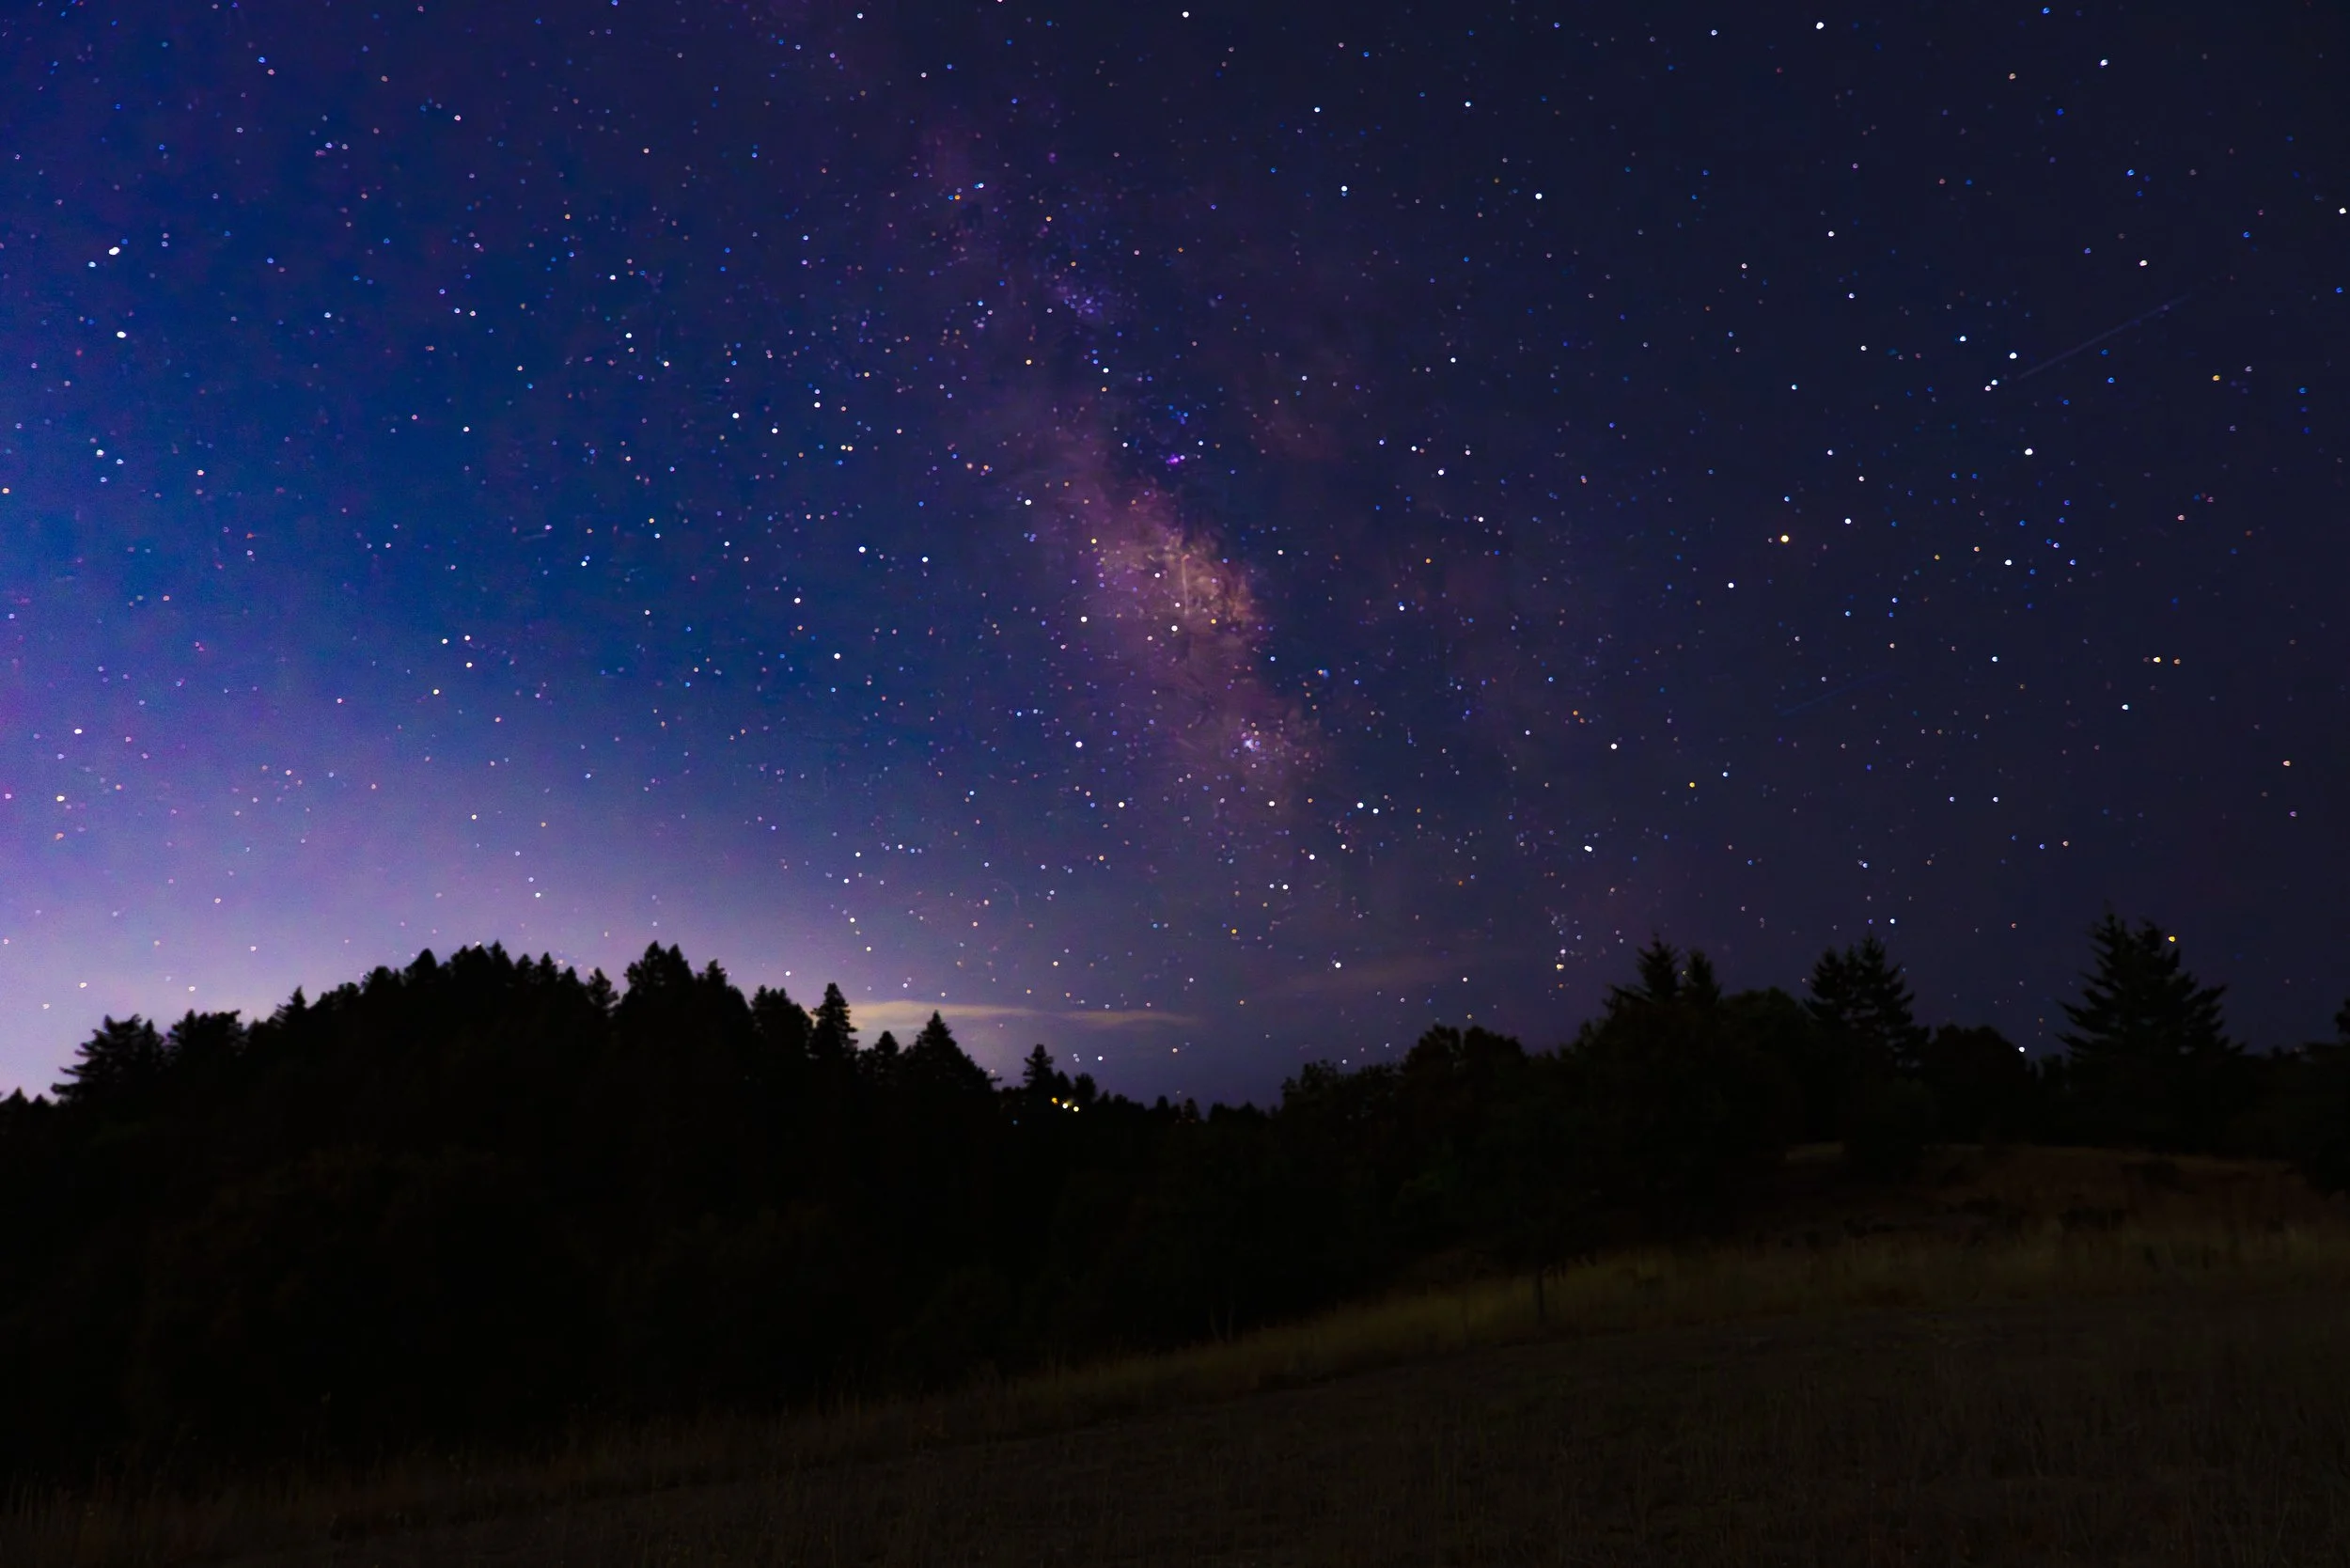
• Focusing on stars and capturing the Milky Way
• Tips for composition with landscapes and foregrounds


Equipment You Need
• Camera: DSLR or Mirrorless (manual mode capable)
• Lens: Wide-angle lens (14mm–24mm recommended, with a wide aperture like f/2.8)
• Tripod: Sturdy and stable for long exposures
• Remote shutter release or timer to avoid camera shake
• Extra batteries & memory cards
Understanding the Key Settings in Astrophotography
1. ISO (Light Sensitivity)
What it is: ISO measures how sensitive your camera’s sensor is to light.
How it works: Higher ISO makes the image brighter by amplifying the light signal, but it also increases noise (grain).
Everyday example: Raising ISO is like turning up the brightness on your phone in a dark room—it helps you see, but the image may look rough.
For astrophotography: Start with ISO 1600–3200. This makes stars visible without too much grain.
2. Shutter Speed (Exposure Time)
What it is: The amount of time the camera’s sensor is exposed to light.
How it works: Longer shutter speeds let in more light, making stars brighter. But if it’s too long, stars will turn into trails because the Earth rotates.
Everyday example: Think of filling a cup with water. The longer the tap is open, the more water (light) you collect.
For astrophotography: Use 15–25 seconds. To calculate your max shutter speed, use the 500 Rule:
500÷focallength=maxsecondsbeforestarstrail500 ÷ focal length = max seconds before stars trail500÷focallength=maxsecondsbeforestarstrail
Example: 500 ÷ 20mm = 25 seconds.
3. Aperture (f-stop, Lens Opening)
What it is: How wide the lens opens to let in light.
How it works: A lower f-number (like f/2.8) = wider opening = more light. A higher f-number (like f/11) = smaller opening = less light.
Everyday example: It’s like the pupil in your eye. In the dark, your pupils get big to let in more light.
For astrophotography: Use the lowest number your lens allows (f/2.8 or lower).
4. Focus (Sharpness of Stars)
What it is: The adjustment that makes stars look sharp instead of blurry.
How it works: Autofocus doesn’t work in darkness, so you must focus manually.
Everyday example: Like adjusting binoculars until objects look sharp.
For astrophotography: Switch to manual focus, point at a bright star or distant light, zoom in with live view, and adjust until sharp. Tape the ring if needed.
5. White Balance (Color Temperature)
What it is: Controls how warm (orange) or cool (blue) your photo looks.
How it works: Different light sources (sun, lamps, moon) give different colors. White balance corrects them.
Everyday example: When you take a photo indoors, sometimes it looks too yellow—that’s white balance.
For astrophotography: Set it to 3500K–4500K for a natural sky. If unsure, leave it on Auto and adjust later if shooting RAW.
6. File Format (RAW vs JPEG)
What it is: How your camera saves the photo.
How it works:
JPEG is smaller but compresses the image, losing detail.
RAW keeps all the light data, giving maximum flexibility in editing.
Everyday example: JPEG is like a printed photo; RAW is like the original negative you can re-develop many ways.
For astrophotography: Always shoot in RAW.
Key Takeaway:
Astrophotography is about balancing ISO (brightness/noise), Shutter Speed (time/light), and Aperture (lens opening) while keeping stars sharp (focus) and colors natural (white balance).
How to Set Up Your Camera for Astrophotography
Step 1. Mount Your Camera
Attach your camera securely to a sturdy tripod.
Turn off image stabilization (on the lens or camera body) — it can cause blur when the camera is on a tripod.
Step 2. Choose Manual Mode
Set your camera to M (Manual) so you control aperture, shutter speed, and ISO.
Step 3. Set Your Lens
Switch your lens to Manual Focus (MF).
Open your aperture as wide as possible (e.g., f/2.8 or lower).
Step 4. Focus on the Stars
Point at a bright star or distant light.
Use Live View, zoom in on the star, and slowly turn the focus ring until the star looks like a small, sharp dot.
Lock it with tape if you’re worried it may move.
Step 5. Dial in Your Exposure Settings
Aperture: f/2.8 (or your lens’ lowest number).
Shutter Speed: 15–25 seconds (use the 500 Rule: 500 ÷ focal length).
ISO: Start at 1600–3200, adjust after test shots.
White Balance: 3500K–4500K (or Auto if shooting RAW).
File Format: RAW.
Step 6. Eliminate Shake
Use a remote shutter or your camera’s 2–5 second timer.
This prevents blur from pressing the shutter button.
Step 7. Take a Test Shot
Check the image on your screen:
Are stars sharp? → Good focus.
Too dark? → Increase ISO or lengthen shutter speed slightly.
Too bright or trailing stars? → Lower ISO or shorten shutter speed.
Step 8. Fine-Tune & Shoot
Once you find the sweet spot, keep shooting!
Try different angles with foreground (trees, rocks, people) for more interesting compositions.
Pro Tips for ISO in Astrophotography
Know your camera’s limit: Some cameras handle ISO 6400 very well, while others get too noisy above 1600. Test yours.
Always shoot in RAW: Noise can be reduced in editing software later.
Stacking images helps: Taking multiple shots and combining them later reduces noise dramatically.
Use trial and error: Start at ISO 3200, check your shot, then adjust up or down depending on brightness.